What is a camping coffee percolator and how do you use it? A camping coffee percolator is a stovetop coffee maker ideal for outdoor use. You use it by adding water to the bottom, coffee grounds to a basket, and heating it until the water cycles through the grounds, brewing coffee. This guide will walk you through percolator coffee brewing, camping coffee instructions, and share percolator coffee camping tips.
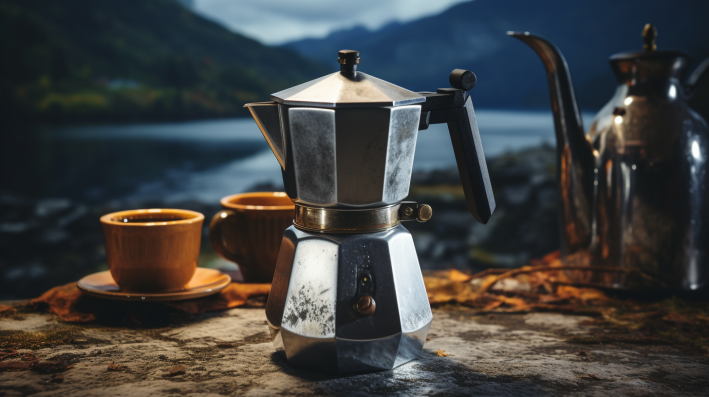
Image Source: shopeverbeam.com
Why Choose a Percolator for Camping?
The great outdoors and a hot cup of coffee go hand-in-hand. But when you’re away from your kitchen, how do you make that perfect brew? A camping coffee percolator offers a simple, reliable, and classic solution. It’s a favored choice for many, offering a rich flavor and nostalgic charm. It’s also a great way to learn how to make coffee outdoors without electricity.
Benefits of Percolator Coffee Brewing
- Durability: Percolators are typically made of stainless steel or enamelware, making them rugged and able to withstand the rigors of camping.
- No Filters Needed: Unlike pour-over methods, a percolator uses a reusable filter basket, meaning less waste and no need to carry paper filters.
- Full-Bodied Flavor: Many coffee lovers enjoy the bold, strong taste that percolators produce.
- Off-Grid Compatibility: Percolators can be used on camp stoves, over a campfire, or on any heat source, making them ideal for off-grid adventures.
- Simple Operation: Once you grasp the basics, percolating coffee is a straightforward process.
Potential Drawbacks of Percolator Coffee
- Over-Extraction: It’s easy to over-extract coffee with a percolator, leading to a bitter taste if not managed properly.
- Temperature Control: Achieving the right temperature can be tricky, especially over a campfire.
- Sediment: Percolated coffee can sometimes have sediment at the bottom of the cup.
Gear Up: What You’ll Need
Before you dive into percolator coffee brewing, make sure you have these essentials:
- Camping Coffee Percolator: Choose a size that suits your needs. Common sizes range from 6-cup to 12-cup.
- Coffee: Coarsely ground coffee is best for percolators.
- Water: Filtered water is recommended for the best taste.
- Heat Source: Camp stove or campfire.
- Mug: For enjoying your brew!
- Optional:
- Thermometer: To help monitor water temperature.
- Timer: To control the brewing time.
- Heat-resistant gloves: For handling the hot percolator.
- Pot holder or trivet: To protect surfaces.
Step-by-Step: Percolator Coffee Instructions for Camping
Follow these simple steps to make delicious coffee with your camping percolator:
- Fill the Percolator with Water: Pour water into the bottom chamber of the percolator. Most percolators have a fill line inside; otherwise, a good rule of thumb is to fill it to just below the bottom of the basket.
- Add Coffee Grounds to the Basket: Place coarsely ground coffee into the basket. A general guideline is 1-2 tablespoons of coffee per cup of water. Adjust to your preference for percolator coffee strength camping.
- Assemble the Percolator: Place the basket on top of the stem, making sure it’s securely in place. Then, place the lid on the percolator.
- Heat the Percolator: Place the percolator on your heat source. If using a camp stove, start with medium heat. If using a campfire, place the percolator on a stable surface near the coals.
- Watch for the Percolation: As the water heats, it will start to bubble up the stem and percolate through the coffee grounds. You’ll see and hear this process through the glass knob on top.
- Control the Brew Time: Once percolation begins, reduce the heat slightly to maintain a gentle, steady cycle. Brew for 6-8 minutes for a medium-strength coffee. For a stronger brew, percolate for a few minutes longer. But be careful, over-extraction results in bitter coffee.
- Remove from Heat: After the desired brew time, remove the percolator from the heat source.
- Let it Settle: Allow the coffee to sit for a minute or two to let the grounds settle at the bottom.
- Serve and Enjoy: Carefully pour the coffee into your mug and savor the rich, flavorful brew.
Mastering Percolator Coffee: Tips and Tricks
To elevate your percolator coffee brewing game, consider these percolator coffee camping tips:
Grind Size Matters
Use coarsely ground coffee specifically for percolators. Finer grounds can clog the filter basket and lead to a muddy brew.
Water Quality is Key
Use filtered water for the best-tasting coffee. Impurities in tap water can affect the flavor.
Start with the Right Ratio
Experiment with the coffee-to-water ratio to find your perfect percolator coffee strength camping. Start with 1-2 tablespoons of coffee per cup of water and adjust accordingly.
Control the Heat
Maintaining a consistent, moderate heat is crucial. High heat can lead to over-extraction and bitterness.
Watch the Percolation
Pay attention to the percolation process. A slow, steady cycle is ideal. If it’s too vigorous, reduce the heat.
Don’t Over-Percolate
Over-percolating can result in bitter coffee. Stick to the recommended brewing time (6-8 minutes) and adjust based on your taste.
Clean Your Percolator
Thoroughly clean your percolator after each use to prevent buildup and maintain its performance.
Pre-Heat Water
Pre-heating the water can speed up the process, especially in cold weather.
Use a Heat Diffuser
When using a camp stove, a heat diffuser can help distribute the heat evenly and prevent scorching.
Consider a Percolator Cozy
A cozy can help insulate the percolator and maintain the coffee’s temperature, especially on chilly mornings.
Choosing the Right Camping Coffee Percolator
The market offers a variety of camping coffee percolators. Here’s how to choose the best camping coffee method for you.
Material
- Stainless Steel: Durable, easy to clean, and doesn’t impart any flavors to the coffee.
- Enamelware: Classic look, but can chip or crack if not handled carefully.
- Aluminum: Lightweight, but can react with acidic foods and impart a metallic taste.
Size
Consider the number of people you’ll be brewing for. Percolators typically come in 6-cup, 8-cup, 9-cup, and 12-cup sizes.
Features
- Glass Knob: Allows you to monitor the percolation process.
- Wide Base: Provides stability on a camp stove or campfire.
- Bail Handle: Makes it easy to carry and pour, especially when hot.
- Perforated Basket: Ensure holes are evenly spaced and not too large.
Top-Rated Camping Coffee Percolators
| Percolator | Material | Capacity | Pros | Cons |
|---|---|---|---|---|
| GSI Outdoors Glacier Stainless Steel | Stainless Steel | 8-Cup | Durable, easy to clean, classic design | Can be pricier than other options |
| Coleman 9-Cup Percolator | Enamelware | 9-Cup | Affordable, nostalgic look, good for larger groups | Enamel can chip, may require more care |
| Farberware Classic Stainless Steel | Stainless Steel | 8-Cup | Classic design, suitable for stovetop and camping | Can be more challenging to clean the spout |
Campfire Coffee Percolator vs. Stovetop Coffee Percolator Camping
While the basic principles of using a percolator remain the same, there are some differences when using a campfire versus a camp stove.
Campfire Coffee Percolator
- Heat Control: More challenging to control the heat. Use a stable surface near the coals and adjust the distance to regulate the temperature.
- Smoke: Be prepared for some smoke. Choose a location with good ventilation.
- Cleaning: Cleaning can be messier due to soot and ash.
Stovetop Coffee Percolator Camping
- Heat Control: Easier to control the heat, resulting in a more consistent brew.
- Cleanliness: Less messy than using a campfire.
- Portability: Requires a camp stove, which adds to your gear.
Cleaning Your Camping Coffee Percolator
Proper cleaning will extend the life of your percolator and ensure great-tasting coffee every time.
- Cool Down: Allow the percolator to cool completely before cleaning.
- Disassemble: Remove the basket and stem.
- Rinse: Rinse all parts with warm, soapy water.
- Scrub: Use a non-abrasive sponge or brush to remove any coffee residue.
- Clean the Spout: Use a small brush or pipe cleaner to clean the spout and prevent clogs.
- Rinse Thoroughly: Rinse all parts thoroughly to remove any soap residue.
- Dry: Dry all parts completely before reassembling and storing.
- Deep Cleaning: For stubborn stains or buildup, soak the percolator in a solution of baking soda and water.
Portable Coffee Maker Camping: Alternatives to Percolators
While percolators are a great option, there are other portable coffee maker camping choices:
- French Press: Simple, portable, and produces a rich, full-bodied coffee.
- Pour-Over: Lightweight and allows for precise control over the brewing process.
- AeroPress: Compact and produces a smooth, concentrated coffee.
- Instant Coffee: The easiest and most convenient option, but lacks the flavor of freshly brewed coffee.
Fathoming Percolator Coffee Strength Camping
The strength of your percolated coffee depends on several factors:
- Coffee-to-Water Ratio: More coffee equals stronger coffee.
- Grind Size: A coarser grind results in a cleaner, less bitter brew.
- Brewing Time: Longer brewing time extracts more flavor, but can also lead to bitterness.
- Heat: High heat can over-extract the coffee and make it bitter.
Experiment with these variables to find the perfect balance for your taste.
FAQ: Percolator Coffee
- Can I use pre-ground coffee in a percolator? Yes, but coarsely ground coffee is recommended for the best results.
- How much coffee do I use per cup in a percolator? A general guideline is 1-2 tablespoons of coffee per cup of water.
- How long should I percolate coffee? 6-8 minutes is a good starting point for a medium-strength coffee.
- Why is my percolator coffee bitter? Over-extraction, high heat, or using finely ground coffee can cause bitterness.
- How do I prevent sediment in my percolator coffee? Use a coarse grind, allow the coffee to settle before pouring, and avoid over-percolating.
- Can I use a percolator on an induction cooktop? Only if the percolator is made of a magnetic material, such as stainless steel.
- Is percolator coffee as good as other methods? That’s a matter of personal preference. Many people enjoy the bold, strong flavor of percolated coffee.
- What is the best way to clean a camping coffee percolator while camping? Use biodegradable soap and water, and be sure to dispose of the wastewater responsibly.
With these tips and tricks, you’re well-equipped to enjoy delicious percolator coffee while camping. Happy brewing!
My name is Gareth Lewis, and I’m the voice behind CampingGuider.com.. I created this space to share my passion for camping and the great outdoors. With years of experience and countless adventures under my belt, I aim to inspire and guide fellow enthusiasts. Whether you’re a seasoned camper or a curious beginner, my goal is to provide you with practical tips, honest reviews, and insights to help you make the most out of your outdoor escapades. Join me on this journey, and let’s explore the beauty of nature together!