What is a camping percolator and how do you use it? A camping percolator is a type of coffee maker that uses a cycle of boiling and gravity to brew coffee. You use it by adding coffee grounds and water to the pot, heating it over a heat source, and letting the hot water cycle through the grounds until the coffee reaches your desired strength. This guide will provide detailed percolator camping instructions for getting that perfect cup outdoors.
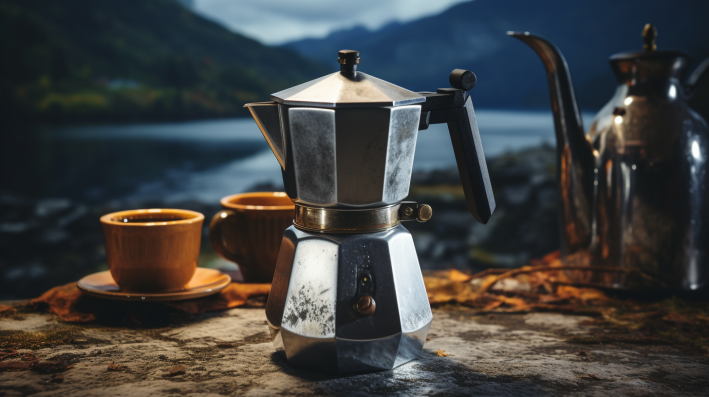
Image Source: shopeverbeam.com
Why Choose a Percolator for Camping?
When it comes to camping coffee brewing methods, you have many options. But percolators are a classic choice and offer several advantages:
- Durability: Camping percolators are typically made of stainless steel or enameled steel, making them rugged and able to withstand the rigors of outdoor life.
- No Filters Needed: Unlike pour-over or drip methods, percolators don’t require paper filters, reducing waste and simplifying your packing list.
- Large Batch Brewing: Percolators are ideal for brewing coffee for a group, making them perfect for camping with friends or family.
- Ease of Use: While there’s a technique to master, using a percolator is relatively straightforward.
- Off-Grid Compatibility: Percolators work on camp stoves, open fires, or even portable induction cooktops, giving you flexibility.
Parts of a Camping Percolator
Before diving into how to percolate coffee outdoors, let’s identify the key components:
- The Pot: This is the main body of the percolator, where the water is heated.
- The Basket: A perforated metal container that holds the coffee grounds.
- The Stem: A tube that connects the pot to the basket, allowing hot water to travel upwards.
- The Spreader/Percolator Top: This sits on top of the basket and disperses the hot water evenly over the grounds.
- The Lid: Keeps heat in and allows you to monitor the brewing process.
Percolator Coffee Brewing: Step-by-Step Guide
Now, let’s get to the heart of the matter: how to use a camping percolator to brew great coffee.
Step 1: Gather Your Supplies
You’ll need:
- Camping Percolator
- Coffee Grounds (coarse grind recommended)
- Water (filtered water is best)
- Heat Source (camp stove, campfire, etc.)
- Measuring Spoon or Scoop
- Mug
Step 2: Fill the Percolator with Water
Pour water into the pot, just below the bottom of the basket when it’s inserted. This prevents the water from overflowing into the basket.
Table 1: Water Level Guidelines
| Percolator Size (Cups) | Approximate Water Level (Cups) |
|---|---|
| 6 | 5 |
| 8 | 7 |
| 12 | 11 |
Step 3: Add Coffee Grounds to the Basket
The right percolator coffee ratio camping is crucial. A general guideline is 1-2 tablespoons of coffee grounds per cup of water. For a stronger brew, use more coffee. For a milder brew, use less. Experiment to find your perfect strength.
Table 2: Coffee Ground Ratios
| Coffee Strength | Coffee to Water Ratio |
|---|---|
| Mild | 1 tablespoon per cup |
| Medium | 1.5 tablespoons per cup |
| Strong | 2 tablespoons per cup |
Important Considerations:
- Use coarse ground coffee. Fine grounds can clog the basket and result in bitter coffee.
- Avoid overfilling the basket. The water needs to circulate freely.
Step 4: Assemble the Percolator
Place the stem into the pot, ensuring it’s properly seated. Place the basket on top of the stem, and put the spreader/percolator top on the basket.
Step 5: Heat the Percolator
Place the assembled percolator on your heat source. If using a camp stove, start with medium heat. If using a campfire, position the percolator carefully over the coals, avoiding direct flames that can overheat the bottom.
Step 6: Monitor the Brewing Process
This is where the magic happens. Keep a close eye on the percolator. After a few minutes, you should see water bubbling up through the clear knob on the lid.
- Initial Phase: The first few cycles will produce a light-colored liquid.
- Brewing Phase: As the coffee brews, the liquid will darken.
- Adjusting the Heat: Once the perking begins, reduce the heat to a simmer. This prevents the coffee from boiling and becoming bitter. Aim for a gentle, consistent perking action.
Step 7: Control the Brewing Time
Brewing time is a matter of preference. A general guideline is 6-8 minutes of perking. For a stronger brew, perk longer (up to 10 minutes). For a milder brew, perk for a shorter time (4-6 minutes).
Step 8: Remove from Heat and Let Settle
Once the coffee is brewed to your liking, remove the percolator from the heat. Allow it to sit for a minute or two. This allows the coffee grounds to settle to the bottom, preventing sediment in your cup.
Step 9: Serve and Enjoy
Carefully pour the coffee into your mug and enjoy!
Percolator Camping Tips for Better Coffee
Here are some extra percolator camping tips to help you make the best possible coffee:
- Start with Cold, Fresh Water: This makes a difference in the final flavor.
- Use Quality Coffee: Invest in good-quality coffee beans and grind them coarsely just before brewing. The best coffee for camping percolator is fresh, coarsely ground.
- Pre-Heat the Water (Optional): If you have a separate kettle, pre-heating the water can speed up the brewing process.
- Don’t Over-Percolate: Over-percolating extracts bitter compounds from the coffee grounds.
- Consider a Heat Diffuser: When using a camp stove, a heat diffuser can help distribute the heat evenly and prevent scorching.
- Practice at Home: Before taking your percolator camping, practice using it at home to get a feel for the process and dial in your preferred brewing time and coffee-to-water ratio.
Percolator Camping Troubleshooting
Even with the best intentions, things can sometimes go wrong. Here are some common percolator camping troubleshooting scenarios and solutions:
- Coffee is Weak:
- Cause: Not enough coffee grounds, too short brewing time.
- Solution: Use more coffee grounds, increase brewing time.
- Coffee is Bitter:
- Cause: Over-percolating, fine coffee grounds, overheating.
- Solution: Reduce brewing time, use coarser coffee grounds, reduce heat, or use a heat diffuser.
- Coffee Grounds in the Coffee:
- Cause: Basket is not properly seated, fine coffee grounds.
- Solution: Ensure the basket is securely in place, use coarser coffee grounds, or try using a coffee filter in the basket.
- Percolator Isn’t Percolating:
- Cause: Not enough water, blocked stem, insufficient heat.
- Solution: Add more water, ensure the stem is clear of obstructions, increase the heat.
- Coffee Tastes Burnt:
- Cause: Overheating, scorched coffee grounds.
- Solution: Reduce the heat, use a heat diffuser, or move the percolator further away from the heat source.
Cleaning Camping Percolator
Proper cleaning is essential for maintaining your percolator and ensuring good-tasting coffee for years to come. Here’s how to clean your camping percolator:
- Cool Down: Allow the percolator to cool completely before cleaning.
- Disassemble: Remove the basket, stem, and spreader/percolator top.
- Empty Grounds: Dispose of the used coffee grounds.
- Wash with Soap and Water: Wash all parts of the percolator with warm, soapy water. Use a non-abrasive sponge or cloth.
- Rinse Thoroughly: Rinse all parts thoroughly with clean water.
- Dry Completely: Dry all parts completely before storing. This prevents rust and mildew.
Dealing with Stains and Mineral Deposits:
- Vinegar Solution: For stubborn stains or mineral deposits, soak the percolator parts in a solution of equal parts white vinegar and water for several hours, or overnight. Then, wash and rinse as usual.
- Baking Soda Paste: For tough stains, make a paste of baking soda and water. Apply the paste to the stains, let it sit for a few minutes, and then scrub gently.
Stovetop Percolator Camping: Choosing the Right Model
Selecting the right stovetop percolator camping is important for a smooth brewing experience. Consider these factors:
- Material: Stainless steel is durable, rust-resistant, and easy to clean. Enameled steel is also durable, but can chip if mishandled.
- Size: Choose a size that matches your camping group’s needs.
- Handle: Look for a heat-resistant handle that’s comfortable to grip.
- Base: A wide base provides stability on camp stoves.
- Design: Consider a percolator with a clear glass or plastic knob on the lid so you can easily monitor the brewing process.
Other Camping Coffee Brewing Methods
While percolators are great, here are some other popular camping coffee brewing methods:
Table 3: Comparison of Camping Coffee Brewing Methods
| Method | Pros | Cons |
|---|---|---|
| Percolator | Durable, no filters needed, large batch brewing | Can be prone to bitterness if not brewed carefully |
| French Press | Rich, full-bodied flavor, easy to use | Requires careful cleaning, can leave sediment in the coffee |
| Pour-Over | Clean, bright flavor, precise control over brewing | Requires filters, more time-consuming |
| AeroPress | Smooth, concentrated coffee, easy to clean | Small batch brewing, requires filters |
| Instant Coffee | Quick and easy | Lacks flavor and aroma compared to other methods |
| Cowboy Coffee | Simple, uses minimal equipment | Can be messy, difficult to control strength |
Frequently Asked Questions (FAQ)
- Can I use pre-ground coffee in a percolator? Yes, but use a coarse grind for best results.
- Is a percolator better than a drip coffee maker? It depends on your preference. Percolators produce a different flavor profile, often bolder and richer, but can be more prone to bitterness if not brewed carefully.
- How do I prevent my coffee from being bitter in a percolator? Use coarse ground coffee, reduce brewing time, and avoid overheating.
- Can I use a percolator on an induction cooktop? Yes, if the percolator is made of a material that’s compatible with induction cooktops (e.g., stainless steel).
- How much coffee should I use in my percolator? A general guideline is 1-2 tablespoons of coffee grounds per cup of water.
- What kind of coffee is best for a percolator? A dark roast, coarsely ground coffee is often preferred for percolators.
- How long should I percolate coffee? 6-8 minutes is a good starting point, but adjust to your taste.
- How do I clean a camping percolator? Wash it with warm, soapy water and dry it completely. Use vinegar or baking soda for stubborn stains.
- Why is my percolator not working? Check that there’s enough water, the stem is clear, and the heat source is sufficient.
By following these guidelines, you’ll be well on your way to brewing delicious, satisfying coffee with your camping percolator, enhancing your outdoor adventures with the perfect cup.
My name is Gareth Lewis, and I’m the voice behind CampingGuider.com.. I created this space to share my passion for camping and the great outdoors. With years of experience and countless adventures under my belt, I aim to inspire and guide fellow enthusiasts. Whether you’re a seasoned camper or a curious beginner, my goal is to provide you with practical tips, honest reviews, and insights to help you make the most out of your outdoor escapades. Join me on this journey, and let’s explore the beauty of nature together!