What is the best way to keep a cooler cold while camping? The best way to keep a cooler cold while camping involves several strategies working together: starting with a high-quality cooler, pre-chilling it, using the right type of ice (or ice alternatives), packing it efficiently, and keeping it in a cool, shaded location. This article will delve into each of these strategies to help you achieve maximum camping cooler ice retention.
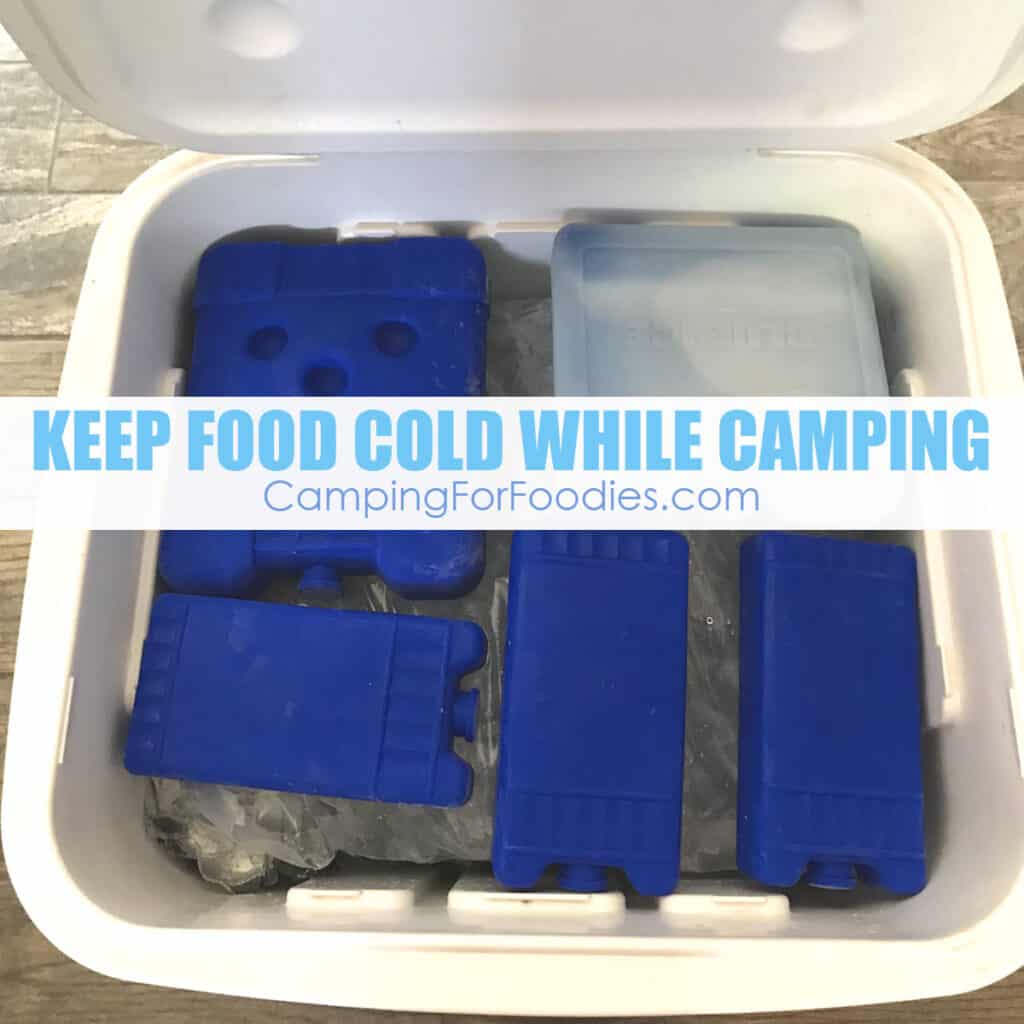
Image Source: www.campingforfoodies.com
Selecting the Right Cooler for the Job
The first step in prolonging cooler ice life is choosing the right cooler. Not all coolers are created equal. The level of cooler insulation techniques varies significantly, impacting how long your ice will last.
Cooler Construction and Insulation
The type of construction and insulation directly affects ice retention.
- Rotomolded Coolers: These coolers are known for their exceptional durability and ice retention capabilities. They are made using a rotational molding process, creating a seamless, thick-walled construction with dense insulation. They are generally more expensive.
- Hardside Coolers: These are common and come in a variety of sizes and insulation qualities. Look for models with thicker walls and well-sealed lids for better ice retention.
- Softside Coolers: These are lightweight and portable but offer less insulation than hardside coolers. They are best for short trips or when space is limited.
Important Cooler Features
Consider these features when choosing a cooler:
- Thickness of Insulation: The thicker the insulation, the better the ice retention.
- Gasket Seal: A tight-fitting gasket around the lid prevents warm air from entering and cold air from escaping.
- Latches: Secure latches ensure the lid stays tightly closed.
- Drain Plug: A drain plug makes it easy to drain melted ice.
- Size and Capacity: Choose a size appropriate for the length of your trip and the amount of food and drinks you need to keep cold.
Camping Cooler Ice Retention Table
| Cooler Type | Insulation Quality | Durability | Price | Best For |
|---|---|---|---|---|
| Rotomolded | Excellent | Excellent | High | Long trips, demanding conditions |
| Hardside | Good to Excellent | Good | Medium | Weekend trips, general camping |
| Softside | Fair | Fair | Low | Short trips, portability |
Pre-Cooling Your Cooler: A Crucial Step
Pre-chill cooler camping is one of the most overlooked but most effective techniques for keeping food cold camping. A warm cooler will melt ice much faster.
Why Pre-Cooling Works
Pre-cooling lowers the internal temperature of the cooler before you add ice and food. This reduces the amount of energy required from the ice to cool the cooler itself, resulting in longer ice life.
How to Pre-Cool
- Use Ice Packs: Place ice packs or frozen water bottles inside the cooler 12-24 hours before packing it.
- Use Ice: Fill the cooler with sacrificial ice a day before, then drain it just before adding fresh ice and your food.
- Store in a Cool Place: Keep the cooler in a cool, shaded area or inside an air-conditioned room.
Packing Your Cooler Like a Pro
How to pack a cooler for camping significantly impacts how long the ice lasts.
Layering for Success
- Bottom Layer: Place the items you need to stay coldest at the bottom, such as raw meat, dairy products, and frozen items.
- Ice Placement: Distribute ice evenly throughout the cooler, focusing on the bottom and sides. Use larger blocks of ice, as they melt slower.
- Barrier Layer: Place a barrier (like a towel or cardboard) between the ice and delicate items like fruits and vegetables to prevent freezing.
- Top Layer: Place items you’ll use most frequently on top for easy access.
Minimizing Airspace
- Fill Empty Space: Use towels, blankets, or crumpled newspaper to fill any empty space in the cooler. Air pockets accelerate ice melt.
- Consider Water: Once items are packed and covered with ice, pour cold water into any remaining spaces. This helps eliminate air pockets and maintains consistent cold.
Choosing the Right Ice (or Ice Alternatives)
The type of ice you use affects how long it lasts. Considering cooler ice pack alternatives can also be beneficial.
Ice Types
- Block Ice: This melts much slower than cubed ice due to its lower surface area. It’s ideal for long trips.
- Cubed Ice: This cools items faster but melts more quickly. It’s good for short trips or for supplementing block ice.
- Crushed Ice: Avoid crushed ice, as it melts the fastest.
Cooler Ice Pack Alternatives
- Frozen Water Bottles: These are reusable and don’t create a soggy mess as they melt.
- Commercial Ice Packs: These come in various sizes and shapes and can be refrozen. Choose high-quality packs designed for extended cooling.
- DIY Ice Packs: Freeze water in zip-lock bags. Double bag to prevent leaks.
Advantages of Different Ice Types
| Ice Type | Melting Rate | Cooling Speed | Advantages | Disadvantages |
|---|---|---|---|---|
| Block Ice | Slow | Slow | Long-lasting, minimal mess | Takes longer to cool items |
| Cubed Ice | Medium | Fast | Cools items quickly, readily available | Melts faster, can leave a soggy mess |
| Frozen Bottles | Slow | Slow | Reusable, no mess | Takes time to freeze, bulky |
| Commercial Packs | Slow | Fast | Reusable, consistent performance | Can be expensive |
Cooler Placement and Maintenance
Cooler placement camping can make a significant difference in ice retention. Proper maintenance also helps.
Choosing the Right Spot
- Shade is Your Friend: Keep the cooler out of direct sunlight. Place it under a tree, awning, or tarp.
- Elevate the Cooler: Place the cooler on a platform or wooden planks to insulate it from the warm ground.
- Avoid Hot Surfaces: Don’t place the cooler on asphalt, sand, or other surfaces that absorb heat.
Minimizing Lid Openings
- Plan Ahead: Think about what you need before opening the cooler.
- Quick Access: Get what you need quickly and close the lid tightly.
- Separate Coolers: Consider using a separate cooler for drinks, as these are typically accessed more frequently.
DIY Cooler Enhancements Camping
Simple modifications can significantly improve your cooler’s performance.
Reflective Insulation
- Reflective Tape: Apply reflective tape to the outside of the cooler to reflect sunlight and reduce heat absorption.
- Reflective Blanket: Wrap the cooler in a reflective blanket to provide an extra layer of insulation.
Sealing Gaps
- Foam Tape: Use foam tape to seal any gaps around the lid or drain plug.
- Silicone Sealant: Apply silicone sealant to any cracks or openings in the cooler body.
Adding More Insulation
- Insulated Cooler Cover: Buy or create a custom-fit insulated cover for your cooler.
- Foam Padding: Add foam padding to the inside of the cooler walls to increase insulation.
Tips For Specific Camping Scenarios
No two camping trips are identical. Here are tips tailored for various camping scenarios.
Hot Weather Camping
- Freeze Water Jugs: Freeze large water jugs and use them as ice blocks. This provides cold drinking water as the ice melts.
- Wrap in Wet Towels: Wrap the cooler in wet towels. As the water evaporates, it will cool the cooler.
- Frequent Ice Replacements: If possible, replenish ice regularly.
Backpacking
- Use a Lightweight Cooler: Opt for a softside cooler designed for backpacking.
- Freeze-Dried Foods: Pack freeze-dried foods that don’t require refrigeration.
- Stream Cooling: If you are near a cold stream, place food in a waterproof bag and submerge it in the water.
Car Camping
- Bring Extra Ice: Pack more ice than you think you’ll need.
- Power Options: Consider using a powered cooler that plugs into your car’s cigarette lighter.
- Organize Food: Use containers to organize your food and prevent crushing.
Monitoring Cooler Temperature
Keeping track of your cooler’s temperature can prevent food spoilage.
Using a Thermometer
- Digital Thermometer: Use a digital thermometer to monitor the internal temperature of the cooler.
- Placement: Place the thermometer in the warmest part of the cooler, usually near the top.
- Safe Temperature: Keep the temperature below 40°F (4°C) to prevent bacterial growth.
Recognizing Signs of Spoiled Food
- Unpleasant Odor: If food smells bad, discard it immediately.
- Discoloration: Look for any changes in color or texture.
- Slimy Texture: A slimy texture is a sign of bacterial growth.
Other Considerations for Keeping Food Cold Camping
Beyond the cooler itself, consider these factors:
Food Safety
- Cook Food Thoroughly: Cook all meats to a safe internal temperature.
- Wash Hands: Wash your hands frequently with soap and water.
- Avoid Cross-Contamination: Use separate cutting boards and utensils for raw and cooked foods.
Menu Planning
- Plan Simple Meals: Choose meals that require minimal ingredients and preparation.
- Pre-Cook Food: Pre-cook meals at home and store them in airtight containers.
- Avoid Perishable Items: Limit the amount of perishable items you bring.
Best Camping Cooler Tips: Checklist for Success
Here’s a quick checklist to maximize your camping cooler ice retention:
- [ ] Choose a high-quality cooler.
- [ ] Pre-chill the cooler before packing.
- [ ] Use block ice or frozen water bottles.
- [ ] Pack the cooler efficiently, layering items correctly.
- [ ] Minimize airspace inside the cooler.
- [ ] Keep the cooler in a shaded location.
- [ ] Elevate the cooler off the ground.
- [ ] Minimize lid openings.
- [ ] Consider DIY cooler enhancements camping to improve insulation.
- [ ] Monitor the cooler temperature regularly.
Frequently Asked Questions (FAQ)
-
How long will ice last in a cooler?
Ice can last from 1-7 days, depending on the quality of the cooler, the type of ice used, and the ambient temperature.
* Can I use dry ice in my cooler?Yes, but use caution. Dry ice is much colder than regular ice and can freeze food. Wrap it in newspaper or a towel and ensure proper ventilation. Never store dry ice in a completely airtight container.
* What is the best cooler for camping?Rotomolded coolers offer the best ice retention and durability, but hardside coolers are a more affordable option. Softside coolers are best for short trips or when portability is a priority.
* Is it better to use ice packs or ice?Ice packs are reusable and don’t create a mess as they melt, but ice provides better overall cooling. A combination of both can be effective.
* Does the color of the cooler matter?Lighter-colored coolers reflect more sunlight and can help keep the cooler cooler.
* How do I clean my cooler after camping?
Use warm soapy water and a brush to clean the inside and outside of the cooler. Rinse thoroughly and allow it to air dry completely before storing. You can also use a mild bleach solution to disinfect the cooler.
By following these tips and tricks, you can significantly improve your camping cooler ice retention and keep your food and drinks cold and fresh throughout your camping trip. Happy camping!
My name is Gareth Lewis, and I’m the voice behind CampingGuider.com.. I created this space to share my passion for camping and the great outdoors. With years of experience and countless adventures under my belt, I aim to inspire and guide fellow enthusiasts. Whether you’re a seasoned camper or a curious beginner, my goal is to provide you with practical tips, honest reviews, and insights to help you make the most out of your outdoor escapades. Join me on this journey, and let’s explore the beauty of nature together!