What is the best way to keep meat cold while camping? The best way to keep meat cold while camping involves a combination of proper preparation, smart cooler packing, and potentially using alternatives like dry ice or frozen meat to extend its chill. This guide explores these techniques in detail to ensure safe and delicious camping meals.
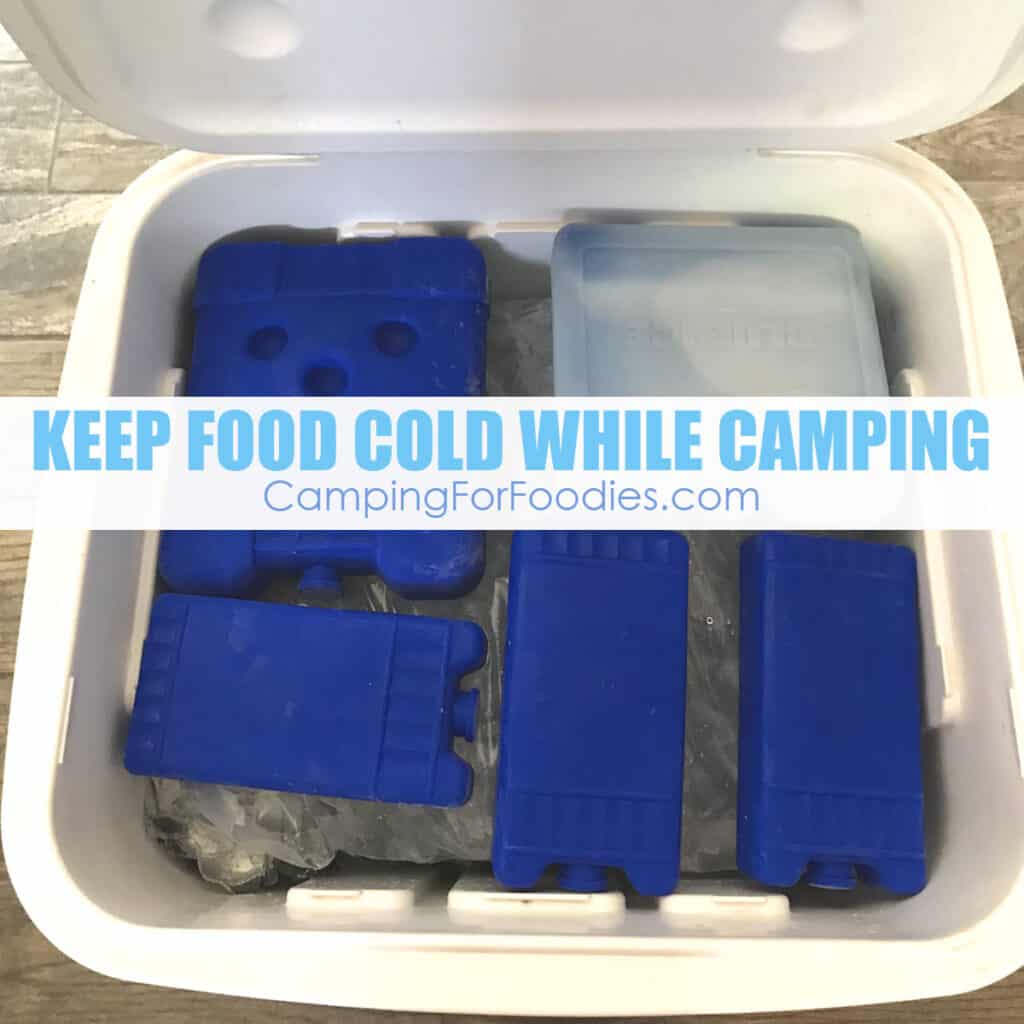
Image Source: www.campingforfoodies.com
Why Proper Camping Meat Storage Matters
Keeping meat cold while camping isn’t just about enjoying a tasty burger in the wilderness. It’s crucial for preventing foodborne illnesses. Harmful bacteria thrive in warm temperatures, and consuming contaminated meat can lead to unpleasant and even dangerous health consequences.
- Food Safety First: Bacteria like Salmonella and E. coli multiply rapidly between 40°F (4°C) and 140°F (60°C). Keeping meat below 40°F (4°C) is essential.
- Preventing Spoilage: Even if bacteria don’t cause illness, warm temperatures can make meat spoil quickly, ruining your meals and potentially wasting food.
- Enjoying the Outdoors Safely: Following proper meat storage protocols allows you to focus on enjoying your camping trip without worrying about food poisoning.
Camping Meat Storage Essentials: Gear Up For Success
Before you even think about packing your cooler, you need the right equipment. Here’s a rundown of must-have items for safe and effective camping meat storage:
- High-Quality Cooler: Invest in a well-insulated cooler. Look for features like thick walls, a tight-fitting lid, and a drain plug. A cooler’s ability to maintain a low temperature is the cornerstone of successful camping meat storage. Consider the “best camping cooler for meat” options available based on your budget and needs.
- Food Thermometer: A digital food thermometer is essential for monitoring the internal temperature of your cooler and the meat itself. This is crucial for ensuring meat safety camping.
- Reusable Ice Packs: While ice cubes work, reusable ice packs (especially hard-sided ones) last longer and don’t melt into water, preventing your meat from getting soggy.
- Dry Ice (Optional): Dry ice is significantly colder than regular ice and can extend the life of your cooler. Handle it with care, as it can cause burns.
- Airtight Containers or Freezer Bags: These will help to prevent cross-contamination and keep your meat dry.
Cooler Packing Tips For Camping: The Art of Cold
How you pack your cooler is just as important as the cooler itself. Follow these cooler packing tips for camping to maximize its cooling efficiency:
- Pre-Chill Your Cooler: Before adding any food, pre-chill your cooler by filling it with ice or ice packs for several hours (or even overnight). This gets the cooler walls nice and cold before you add your perishable goods.
- Freeze Your Meat (When Possible): Freezing meat solid before packing it into the cooler is one of the best ways to extend its chill. Frozen meat acts as an ice pack itself, helping to keep the cooler cold for longer. If you plan to cook the meat on the first day, you can partially thaw it before leaving home.
- Layer Your Cooler Strategically: Place the coldest items (dry ice, if using, or frozen ice packs) at the bottom of the cooler. Since cold air sinks, this ensures that the entire cooler stays cold.
- Organize by Meal: Pack meat for specific meals together in separate containers or freezer bags. This minimizes the amount of time the cooler is open, reducing temperature fluctuations.
- Fill Empty Space: Fill any empty space in the cooler with ice packs or crumpled newspaper. This helps to insulate the contents and prevent them from shifting around.
- Keep it Sealed: Avoid opening the cooler frequently or for extended periods. Each time you open the cooler, warm air enters and compromises its cooling efficiency.
- Use a Separate Cooler for Drinks: Drinks are accessed far more frequently than food. Keeping them in a separate cooler minimizes the number of times your food cooler is opened.
Here’s a sample packing list based on layering method:
| Layer | Items | Purpose |
|---|---|---|
| Bottom | Dry ice (wrapped in newspaper) or frozen ice packs | Provides initial and sustained cooling |
| Second | Heaviest meats (steaks, roasts) – frozen solid if possible | Acts as ice and stays cold longer |
| Third | Pre-chilled or frozen bottles of water | Adds extra ice, provides drinking water later |
| Fourth | Lighter meats (chicken, sausages) | Keeps meats separate and organized |
| Top | Vegetables, fruits, cheese (items that don’t need to be as cold) | Prevents meat juices from contaminating them |
| Empty Spaces | Small ice packs, crumpled newspaper, towels | Insulates and prevents shifting |
Dry Ice For Camping Food: The Deep Freeze Option
Dry ice is a game-changer when you need to keep things extremely cold for an extended period. However, it requires careful handling.
- How it Works: Dry ice is frozen carbon dioxide. It sublimates (turns directly from solid to gas) without melting, making it very effective at cooling.
- Safety Precautions: Always wear gloves when handling dry ice to prevent burns. Never store dry ice in an airtight container, as the expanding gas can cause it to explode.
- Placement: Place dry ice at the bottom of the cooler, wrapped in several layers of newspaper to slow sublimation.
- Considerations: Dry ice can freeze your food solid, so plan accordingly. Allow sufficient thawing time before you intend to cook the meat.
Extending Cooler Life Camping: Pro Tips for Staying Cold
Once your cooler is packed, there are several things you can do to extend its cooling life:
- Keep It in the Shade: Direct sunlight can significantly warm up your cooler. Park your car strategically or use a tarp to provide shade.
- Insulate Further: Wrap your cooler in a blanket or sleeping bag for extra insulation, especially at night when temperatures drop.
- Minimize Opening: Every time you open the cooler, you let in warm air. Plan your meals ahead of time and take out only what you need.
- Drain Water Regularly: If using regular ice, drain the melted water regularly. Water accelerates the melting process of the remaining ice.
- Replace Ice as Needed: Depending on the duration of your trip, you may need to replenish your ice supply. Plan ahead and locate stores or gas stations where you can purchase more ice.
Chilling Meat Without Refrigeration: Alternative Strategies
Sometimes, refrigeration or coolers aren’t an option. In these situations, alternative camping food preservation methods are needed. While these methods aren’t as reliable as keeping meat cold, they can be used in a pinch:
- Salting/Curing: Salting and curing are ancient methods of preserving meat. Salt draws out moisture, inhibiting bacterial growth. This method requires specific knowledge and preparation.
- Drying: Drying removes moisture from meat, making it inhospitable to bacteria. Jerky is a common example of dried meat. This method also requires specific knowledge and preparation. Note: These traditional methods should only be considered if you possess prior knowledge of food curing and preservation techniques. Botulism and other risks are significantly increased if methods are done incorrectly.
Important Disclaimer: These alternative methods are not as reliable as refrigeration and carry a higher risk of foodborne illness. Only use them if you have experience with these techniques and are willing to accept the risks. When in doubt, it’s always best to err on the side of caution and avoid consuming meat that hasn’t been properly refrigerated.
Meat Safety Camping: Spotting the Signs of Spoilage
Even with the best efforts, meat can sometimes spoil. Learn to recognize the signs of spoilage to avoid getting sick:
- Unpleasant Odor: Spoiled meat often has a sour or ammonia-like smell.
- Slimy Texture: A slimy or sticky surface is a sign of bacterial growth.
- Discoloration: Changes in color, such as a greenish or grayish tint, can indicate spoilage.
- Off Taste: If the meat tastes sour, metallic, or otherwise unusual, don’t eat it.
When in Doubt, Throw it Out: If you suspect that meat has spoiled, it’s always best to discard it. Food poisoning can ruin your camping trip (and potentially cause serious health problems).
Portable Coolers For Meat: Choosing the Right Size and Type
Selecting the right portable coolers for meat depends on the length of your camping trip, the amount of meat you plan to bring, and your budget. Here’s a comparison of different types of coolers:
| Type of Cooler | Pros | Cons | Best For |
|---|---|---|---|
| Hard-Sided Coolers | Durable, excellent insulation, can hold a lot of ice | Heavy, bulky, more expensive | Longer camping trips, large groups, keeping meat cold for several days |
| Soft-Sided Coolers | Lightweight, portable, easier to store | Less insulation than hard-sided coolers, may leak | Shorter trips, smaller groups, transporting meat for a day or two |
| Electric Coolers | Maintains a consistent temperature, can be plugged into a car outlet | Requires a power source, can drain car battery, not as efficient as ice coolers in extreme heat | Car camping, keeping food cold on long road trips |
| Insulated Bags | Very lightweight, inexpensive, easy to pack | Minimal insulation, only suitable for very short periods | Transporting meat from the store to the campsite (if you’re cooking it immediately) |
Choosing the right size is also important. Consider how much meat you need to store, plus the amount of ice or ice packs required to keep it cold. A good rule of thumb is to allocate at least one-third of the cooler’s volume to ice.
Fathoming Legal and Environmental Concerns
- Bear Safety: In bear country, proper food storage is crucial for your safety and the safety of wildlife. Store all meat (and other food items) in bear-resistant containers or hang it from a tree at least 10 feet off the ground and 4 feet from the trunk.
- Leave No Trace: Dispose of food waste responsibly. Pack out all trash, including meat wrappers and bones. Never bury food scraps, as this can attract animals.
- Regulations: Some campgrounds have specific regulations regarding food storage. Check with the campground before you go to ensure you comply with their rules.
Frequently Asked Questions (FAQ)
- How long can I keep meat in a cooler while camping? This depends on the type of cooler, the amount of ice, and the ambient temperature. A high-quality cooler with plenty of ice can keep meat cold for 2-3 days. Dry ice can extend this time considerably.
- Can I refreeze meat that has partially thawed in the cooler? It’s generally not recommended to refreeze meat that has partially thawed. The quality of the meat may be compromised, and there’s an increased risk of bacterial growth.
- What’s the best way to thaw frozen meat in a cooler? The safest way to thaw meat in a cooler is to place it in a watertight container and let it thaw slowly in the coldest part of the cooler. This can take several hours or even a day, so plan accordingly.
- Is it safe to eat meat that has been at room temperature for more than two hours? No. Meat that has been at room temperature for more than two hours is considered unsafe to eat. Bacteria can multiply rapidly at room temperature, increasing the risk of foodborne illness.
- Can I use frozen water bottles instead of ice packs? Yes, frozen water bottles are a good alternative to ice packs. They last longer than ice cubes and provide you with drinking water as they thaw.
- What is the best temperature to keep meat at in a cooler? Keep the meat at or below 40°F (4°C). Use a food thermometer to check the temperature regularly.
By following these expert-approved methods, you can confidently keep meat cold while camping and enjoy delicious, safe meals in the great outdoors. Prioritizing food safety ensures a memorable and healthy camping experience.
My name is Gareth Lewis, and I’m the voice behind CampingGuider.com.. I created this space to share my passion for camping and the great outdoors. With years of experience and countless adventures under my belt, I aim to inspire and guide fellow enthusiasts. Whether you’re a seasoned camper or a curious beginner, my goal is to provide you with practical tips, honest reviews, and insights to help you make the most out of your outdoor escapades. Join me on this journey, and let’s explore the beauty of nature together!